I am so beyond excited right now!
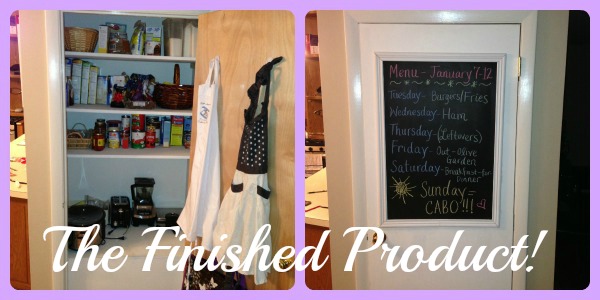
When we moved into our house a few months ago, we didn't have a pantry - just an empty closet in between the kitchen and the dining room. (I have no clue what the previous homeowners used it for...) For the past few months, I've been keeping the food (ok, let's be honest - the massive amount of holiday treats!) in random cupboards throughout the kitchen. It hasn't worked out well - the shelves aren't high enough so I've had to lay down the cereal boxes... I can't see what I already have so I end up buying extras I don't need... I don't know what's stuck in the back so sometimes things get icky (ew!!!)
I had this vision to turn the closet into a pantry, but it had no shelves or anything at all! It seemed like a tough project for little old me to tackle.
One day last week while I was at work, my sweet husband surprised me by putting the shelves up. It took a lot of measuring, sawing, sanding, priming and lots of other manly stuff I don't know how to do, so I was super grateful that he took care of it all. (Thanks, hubs!) He also remembered me saying that it would be cute to have a chalkboard on the door, so he went to Lowe's and got some chalkboard paint and molding to frame it!
Have any of you ever used chalkboard paint? It's pretty cool, actually. You have to lay on a few coats (we did three) and let it dry for about 24 hours in between each coat. When it's dry, you "prime" it by rubbing a piece of chalk all over the board and letting it sit for an hour before wiping it off, and voila! You have your own custom chalkboard that is exactly the size and shape you want it! One day when hubs and I have kids, I want to incorporate this into their rooms!
Side note: as I was wiping it down, I had this memory of the "bad kids" who had to wash the teacher's chalkboard after school as a form of punishment. I also remember volunteering to wash the teacher's chalkboard as a form of sucking up. What a nerd I was...
Anyway, I'm super happy with the end result:
I especially love our husband/wife apron hooks :)